


Dual HYVE WARM Concrete Kit Package
This starter rough in kit includes (20) pre cut sleeves of 2 1/2" x 14" with shaved sleeve so no wider ring on the Hyve is required, meaning a sleeker look! It also includes (300') of 3/4” flexible core-line pending on availability, (500') of 12/2 Landscape Wire, a (1) 100W transformer, (40) 3/4” coreline connectors, (40) 3/4” coreline couplings, (2) roll of duct tape and (20) Hyve (ww) lights to test and rough in during install, with your option to add more lights!
Simply place pre cut sleeves for every light/HYVE product you plan on installing throughout your concrete area.
Next from your low voltage transformer run core-line to first sleeve placed in light location, cut core-line and place under cut pipe location or cut out two 1” holes to place connectors and fasten coreline for a secure placement.
Next run new core-line from sleeve as per above and run to the next sleeve which is the next light location. Continue this till you reach your final light location.
Once core-line runs are roughed in, now you can run your landscape wire. Push wire in from transformer location and follow core-line. Landscape wire is ran throughout each pipe location running continuously in every core-line to final light location. Be sure to pull lots of extra wire at the end as in the next step we will go though the step of leaving extra wire (looped) in each sleeve.
Once wire is ran throughout, now go to each sleeve starting from the last and first and pull back extra wire so each pipe has at least 18" of looped wire inside so later on there is enough to connect the lights in every sleeve.
Once given enough slack of wire in each pipe, again 14" of looped wire suggested in each pipe. Now you can fasten the sleeves to the rebar and place duct tape over and under the pipe to ensure no concrete is poured into the pipe. Remember the lights and wire need to fit in the cut pipe locations so duct tape will ensure concrete does not enter.
Concrete is poured and dried, great now is the fun part!
Sleeves may be lower or higher then the concrete and thats okay. If pipe is higher than the poured concrete simply peel back the top portion of the duct tape and cut back the sleeve so its flush with the concrete ensuring not to cut the wire!
If sleeve is lower, its okay the light (hyve) sits on the concrete so its ready for light install.
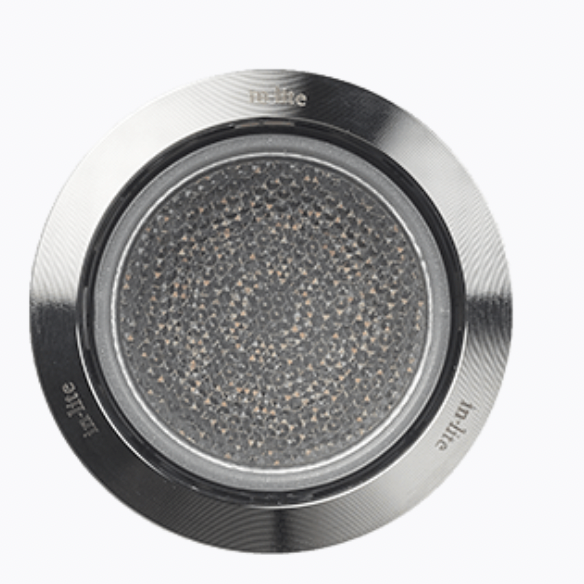
Connecting and installing the HYVE lights. The kit comes with (20) HYVE (ww) light.
The HYVE light comes with a speciality connector, simply peel pack the duct tape as per above step if not done already, grab your slack of wire and connect the wire to the connector. Once connected attached light to connector.
Final step, place small portion of silicon under ring and place light in sleeve, pushing in the wire, connector and light so it fits all in the pipe.
Power on transformer to test lights, if any lights are not on, check connection on wire for that light and ensure the connector was tightened and not loosened when pushing light in.
Related products